FlatCode Java Obfuscator
Guide - Renaming
Go to Obfuscation
|
The Renaming
option of the Flatcode JOB (obfuscation by
renaming the identifiers of a Java bytecode)
replaces the package, class, method, and variable names by
random combination of alphanumeric characters of different
length depending on the application size.
Since string constants can contain meaningful fragments that match the specified replacing names, the obfuscator parses all string constants and detects all such snippets within them. For
each
class, all string constants can be displayed in a String
Constants Tab pane
so as the user may select the
fragments that must be substituted
by their renamed counterpart.
Note that all string
constants within the bytecode of the application are
encrypted for both the obfuscated and renamed versions
and are decrypted at run-time.
|
|
After bytecode analysis, select the Rename
menu bar item and then navigate to the either of
submenus Methods, Fields, Classes. For
the
current version of the Flatcode JOB, pressing
any
of All methods, All fields, or All
classes item will result in renaming all methods,
variables, and classes.
Press 'Confirm rename options' button (1) and start parsing methods and fields of the application. 
When the
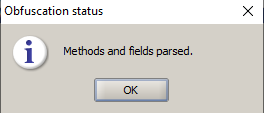
obfuscator informs that this process is
finished
 click the 'Confirm renaming in string constants' button (2). A new tab 'String constants' will appear in the tabbed pane  |
|
|
|
Activate 'General
Reports' tab
and in the directory tree navigate to the class
for which you want to check the string
constants.
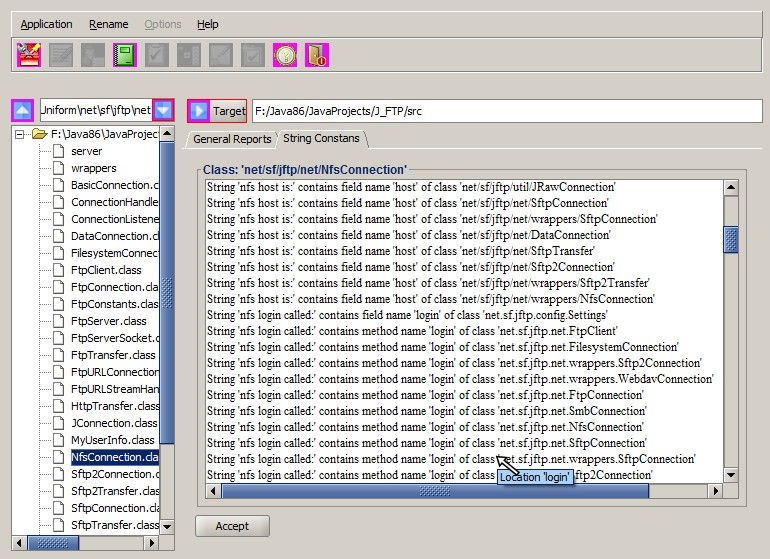
Return to the 'String constants' tab and double click the selected class in the tree. 
The name of the
class appears in the title of the string
constants panel,
and the strings with problematic
fragments detected by the parser
will be listed there.
Each line of the
list describes the problematic entry
literally
matching
a method, field, or package name
along with the name of the
relevant class.

Point mouse
to a line and the method of the indicated class
containing this particular string will be shown.
All string
constants matching complete binary class names are
presented in red.
Select
single or multiple lines containing the words to be
renamed and press the Rename
button at the bottom of the panel. Continue this
procedure for other classes. Then press the Accept
renaming profile button
(3) and proceed to the
obfuscation stage.
NOTE: To perform renaming
without obfuscation
do not check any box under Hide control
flow item of the Options
menu and proceed to the Start renaming button.
|
| If the application contains resource
files
then
the file contents may turn out should be adapted to the
renamed java identifiers. This applies in
particular to class names in properties
and xml files present in the application
package. The Flatcode JOB provides
the ability to automatically
replace the package and class names in these files by
their renamed counterparts. More specifically, the
contents of xml elements as well as the values
in the key-value pairs composed
of the application's packages, directories, or
class names are being adapted to the modified java
bytecode. NOTE: In general, all resource/configuration files are copied from the src directory to the obfuscation directory automatically. However, in order to adapt their contents to renamed bytecode activate once again the General Records tab and in the src directory select all relevant files with extensions properties, xml, fxml, ini, cfg, and config files. Add these files to the 'Classpath' table  and click the Start renaming button. NOTE: These files may also be added to the 'Classpath' table at the beginning of the obfuscation process. |
|
| As in the
case of pure obfuscation, there
are three options to set the
Manifest file when renaming ends: set
a default Manifest, create
an editable Manifest, or apply
a ready Manifest
prepared beforehand by the user in the root directory of the
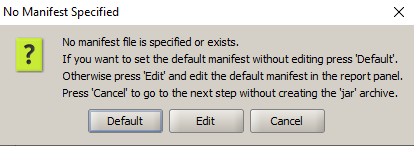
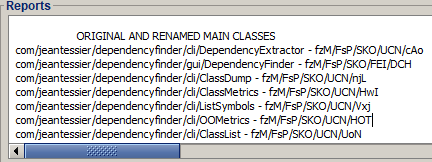
project. Again, if no Manifest found in the application's root directory, the following message appears  In any case, the list of original and renamed main class names appears in the Reports pane of the General Reports tab  Click default and edit the manifest contents. After creating the jar archive a manifest with original main class will be stored in the root path. The copy of the Manifest with renamed main will be stored in the Obfuscation directory, and the resulting jar will contain the manifest with renamed main class. If the obfuscator finds in the root directory a Manifest file then main class of the Manifest presented in the Manifest panel will contain the renamed counterpart of the original name  Always ensure that the Manifest panel contains the renamed version of the main class name. The final renamed classes or the jar file with archived renamed classes are stored in the user-defined obfuscation directory. The non-renamed obfuscated classes are transferred to the Store folder in the application's root directory for references. |